How to Upload Your Amazon A+ Page: A Step-by-Step Guide
Ready to edge out your competition?
Picture this—you have an amazing listing written by a splendid copy team like Marketing by Emma’s, top-notch photos that blow the current bestseller’s out of the water, and a graphic designer who’s handed you a beautiful blend of your copy and images. Higher conversion rates, improved Amazon sales, and better brand recognition await.
All that’s left for brand-registered Amazon sellers like yourself is to upload your Amazon A+ Content—or, as it used to be called, enhanced brand content.
This, however, can be a trickier and more tedious than it seems. So, we crafted a step-by-step, screenshot-laden roadmap on how to upload your Amazon A+ Content the right way.
How Brand Owners Can Create Amazon A+ Content
Before you upload your Amazon A+ Content (or your brand story, for that matter), upload some or all of the rest of your listing, including your title, bullet points, product photos, comparison chart, and product descriptions, as well as any technical information and backend search terms that help highlight your product features and benefits. Once you have your listing’s ASIN, or Amazon Standard Identification Number, you’ll use it to link your Amazon A+ Content to any listing in your Amazon brand registry.
Time to take full advantage of your brand registry and upload your Amazon A+ Content! Let’s start with:
1. Finding Your Enhanced Brand Content Modules
1.1 Log into sellercentral.amazon.com to access Seller Central.
This is where you can upload and manage any product listings you have. Use the Advertising pull-down tab to click on A+ Content Manager, as shown in the screenshot below.

1.2 Click Start Creating A+ Content.

1.3 Select the Basic button underneath Enhanced Product Description.
Notice it says you can upload up to five modules—you can actually upload seven, and we encourage you to do so if it serves your message well. This can make your Amazon A+ Content fuller feeling, and set your page apart from other Amazon sellers.

A side note about your brand story—
Add a Brand Story module if you’d like to enhance how customers perceive your store. It will appear right above your A+ Content. If you’d like to learn more about how a brand story can boost your brand's street cred, read more about it here.
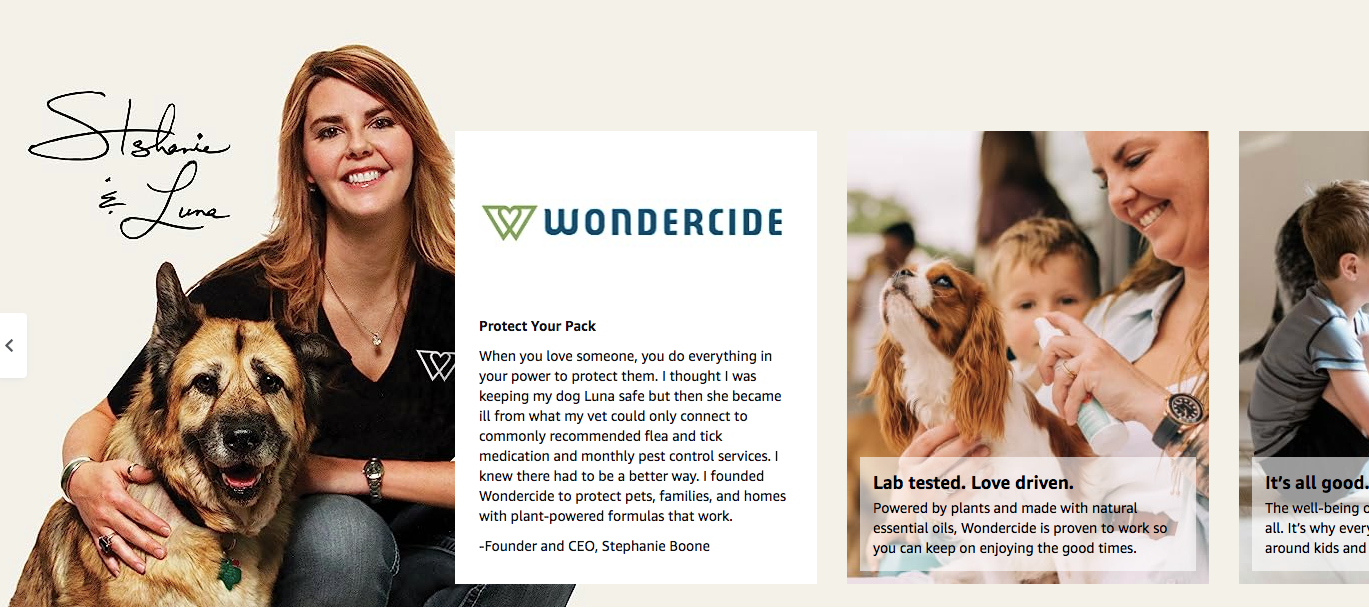
Source: Wondercide Amazon Storefront
If you're interested in learning more about Amazon's Premium A+ Content feature, which allows you to incorporate multimedia content and different modules to further attract potential buyers, read about it here.
1.4 Label your content in Content Name.
Customers can’t see what you write here. It’s similar to a document name you might have for a Word doc, except it’s on your Seller Central account and describes this particular batch of Amazon A+ Content.
Naming your A+ Content batches is useful if you sell multiple products, or if you want to have different sets of media-rich content for one listing, like seasonal sets, for example.
1.5 Next, select your listing’s Language next to the Content Name you just filled out.

Now, you can upload your A+ Content photos. Click the Add Module button to dive in.
2. Uploading Your Handiwork
Remember to plan ahead for this step. Make sure your module layout and edited photos are ready to upload.
You’ll see a list of possible modules you can choose from.

Each option shows the module title and A+ Content examples of how that module will look. Click on one to get started—we’ll show you screenshots of the Standard Four Images & Text option, a multiple image module, for our example.

Every Text Box—tagged either with the phrase Enter Headline Text or Enter Body Text—is optional to fill out.
You may type or paste your copy directly into these fields, or leave them blank. Any text you enter here will appear against a white background, separate from your photos. You can use these fields to enhance and explain the part that’ll draw more attention, your A+ Images. While this text won't be picked up by Amazon's algorithm, it does contribute to your SEO value on search engines.
You can use Text Box text to visually separate your photos from each other, whether you have four small photos or one large banner in a single module. This brings your A+ Content visually in line with the rest of Amazon.com.
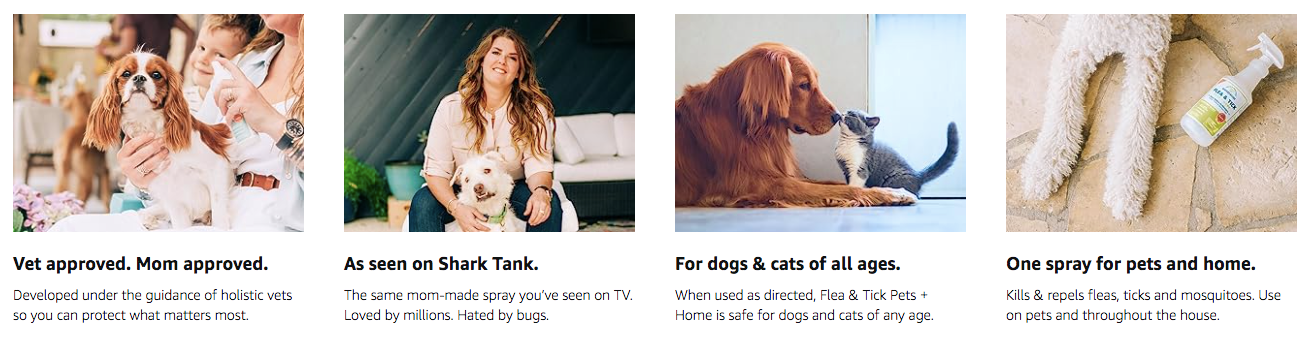
Source: Wondercide's Amazon page
By combining text with your images, you can create A+ Content that looks like its own mini website. Simply leave the Text Boxes blank and add the copy straight onto your images using photo editing software, like the Crocs module below.

Source: Crocs Amazon page
To make your photos crisp and clear, upload a .png instead of a .jpg, and upload a file that’s twice the size of what Amazon asks for. If your module’s blue camera icon asks for a 220:220 pixel photo, for example, that’s the smallest possible size they’ll accept, but you can and should opt for a higher resolution image. Upload a 440:440 pixel photo instead. This will help your images always appear as sharp as possible, especially for large-image modules like the standard image header or company logo (not to mention large-monitored computers).
When you Click to Add Image, this window will pop up.

Either click and drag an image file from your computer’s folders and drop it into this blue box, or click on the blue box. You’ll be able to access your computer’s photos directly. Double-click the image you want once you find it.
Enter a short description of your photo in Image Keywords. Like the name of this box says, you can enter keywords here that Google will be able to index, letting you further boost your listing’s SEO. Opt for high-ranking keywords here, especially ones that are hard to incorporate naturally into your Bullet Points or Product Descriptions. These can be keywords like “sensory toys for kids 8-12” or powerful Spanish keywords that can’t fit into an English-language listing.
If your image has words in it, Amazon will sometimes automatically fill the Image Keywords box with those words. Make sure this box contains the words you want it to before clicking Add.
3. Linking Your Content to Your Amazon Listings
After you’ve uploaded all of your A+ Content modules, click the blue Apply ASINs button in the top right corner. (Remember ASINs? They’re the 10-digit numbers Amazon assigns to every new product available on Amazon.com.) You can add just one or multiple ASINs to this batch of A+ Content. Whatever ASINs you add in the Add ASINs area will show the A+ Content you just created.
To add ASINs, paste the number or type it in exactly to the Add ASINs search bar with the magnifying glass. If your ASIN pops up in the gray space below, click on it to add it. Repeat the process on the same search bar for each listing you want to apply your A+ Content to. The Applied ASINs search bar is useful to find one specific ASIN that you’ve already linked with this A+ Content.

Finally, hit the blue Review and Submit button in the top right corner. Amazon typically takes up to seven days to approve A+ Content for uploading.

The next page will show you how your A+ Content will look to customers in mobile and desktop format. If you’d like to make edits, click the gray Back button in the top-right corner. If you’re satisfied, click Submit at the bottom of the screen.
4. Ready, Set, Sell!

By following the steps we outlined, you can create visually stunning and compelling content that lets you capture your customers' attention, make your unique selling point crystal clear, and increase your conversion rate more rapidly than other Amazon sellers.
Remember to keep your content crisp and clear, use the best image resolution possible, and highlight your product's key features and unique benefits. By doing so, you can differentiate yourself from your competitors and build trust with your customers.
For recommendations on how to best use A+ Content and other aspects of your brand registry, ask for a free listing analysis from Marketing by Emma. One of our expert copywriters will review your listing and send specific tips on how to improve it.
Leave a comment
Please note, comments must be approved before they are published